
Introduction to Stripe
As a web developer, selecting the appropriate payment service provider for your project can pose a daunting challenge. You must take into account various factors, including security, user experience, integration simplicity, and transaction fees, among others. In recent years, Stripe has emerged as a popular payment service provider.
Stripe is a payment service provider that enables businesses to accept payments online. It offers a straightforward and secure method for developers to integrate payment processing into their web applications. With its developer-friendly API, Stripe simplifies the creation of custom payment forms, the management of subscriptions, refunds, and much more. Moreover, Stripe accepts a broad range of payment methods, including credit cards, Apple Pay, Google Pay, and even Bitcoin. Personally, I have come to prefer Stripe as a payment service, and we have utilized it on several Agilno projects.
This article provides a step-by-step demonstration of the simple integration of Stripe Checkout, covering initial project setup, payment processing, and webhooks. Readers will gain a solid understanding of using Stripe. Although actual production-ready integrations may be more complex, especially if we aim for a high level of customization that meets our clients’ expectations at Agilno, by following this guide, beginner developers can effortlessly integrate Stripe into their marketplace websites.
Starting your integration
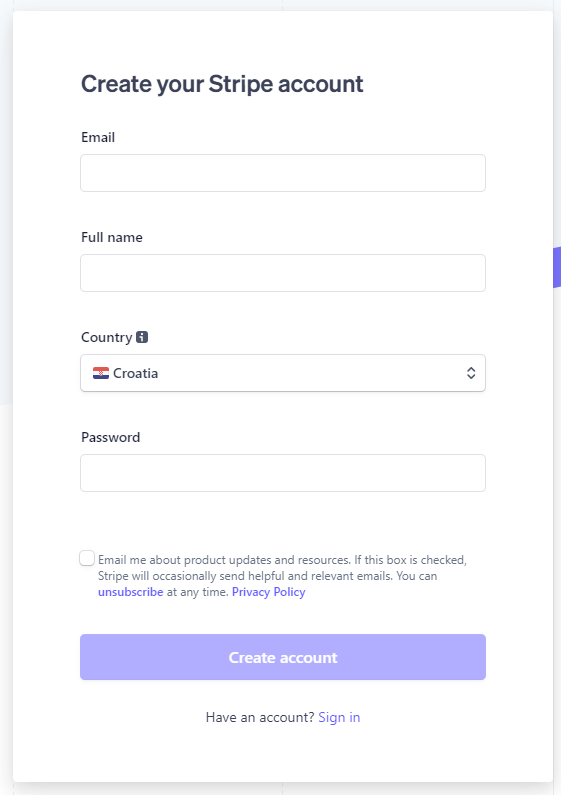
To get started, the first step is to create a Stripe account by visiting their website. After creating an account, you can access a dashboard where you can set up payment processing.
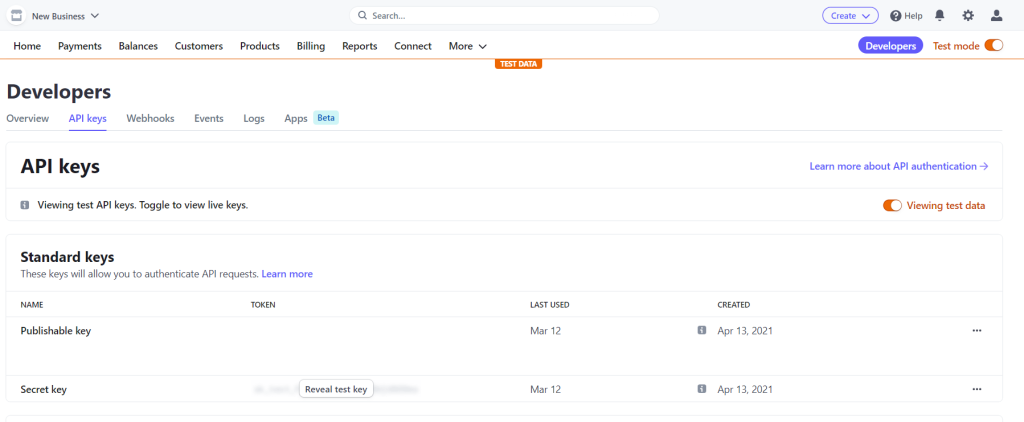
Once you have created your Stripe account, you should toggle the testing switch located in the upper right corner of your screen. After that, navigate to the Developers section and locate your API Keys and Webhook Secret Key.
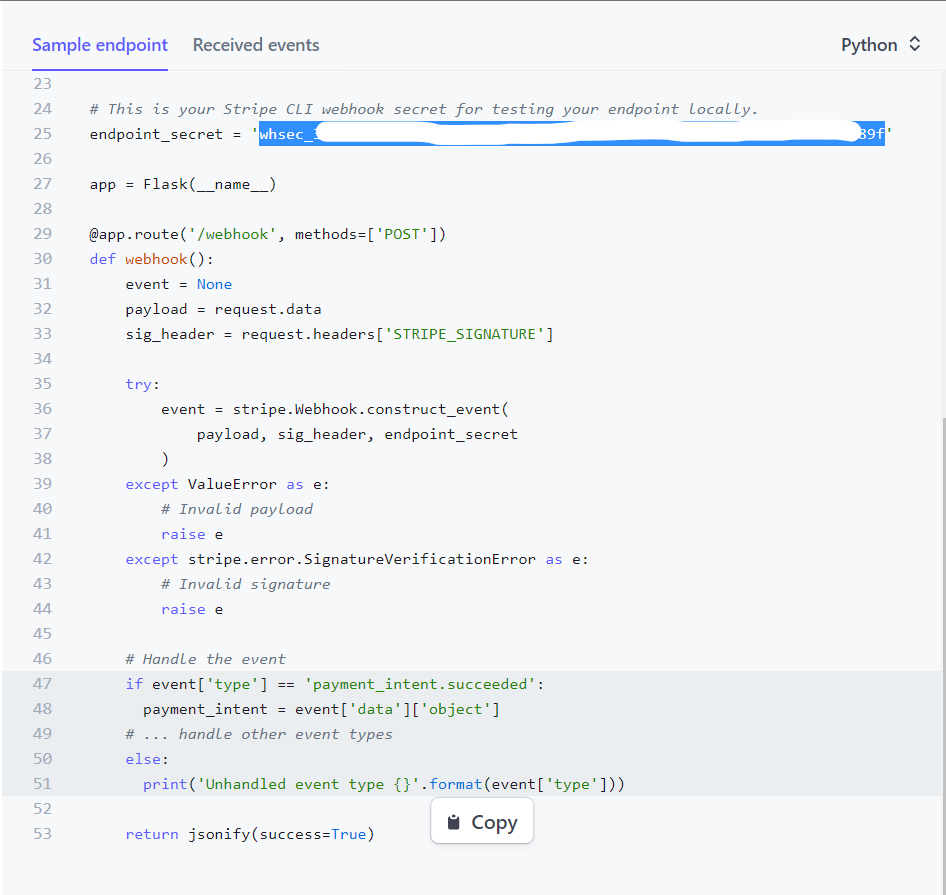
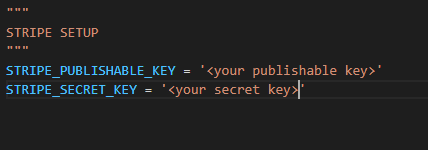
To begin, you will need to add your API keys and webhook secret to your Django project’s settings.py file. This will enable your Django application to securely communicate with Stripe’s API and handle requests. Once you have added these keys, you can start utilizing Stripe’s payment processing and webhook functionalities within your project. It is crucial to remember to keep your API keys and webhook secret secure as they contain sensitive information that should not be shared publicly.

Adding your products to Stripe Dashboard
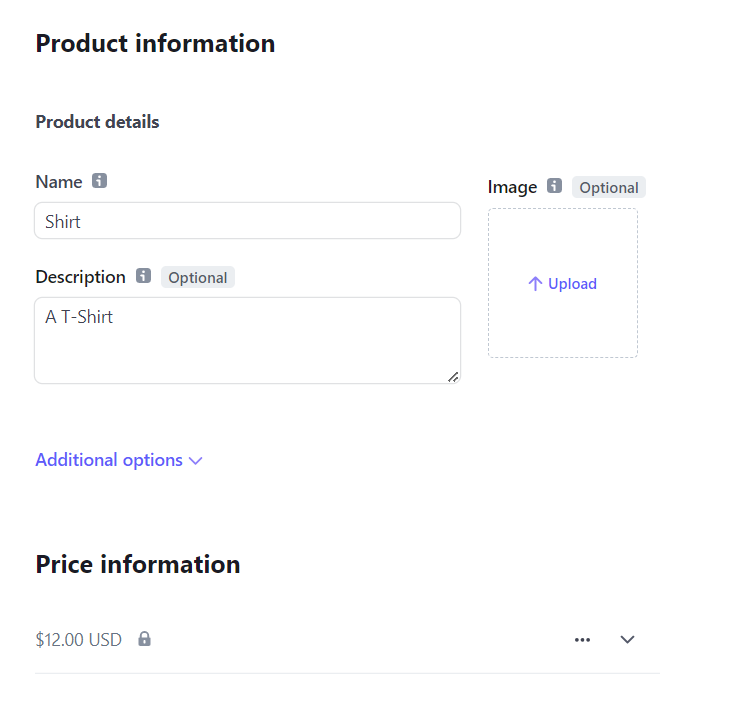
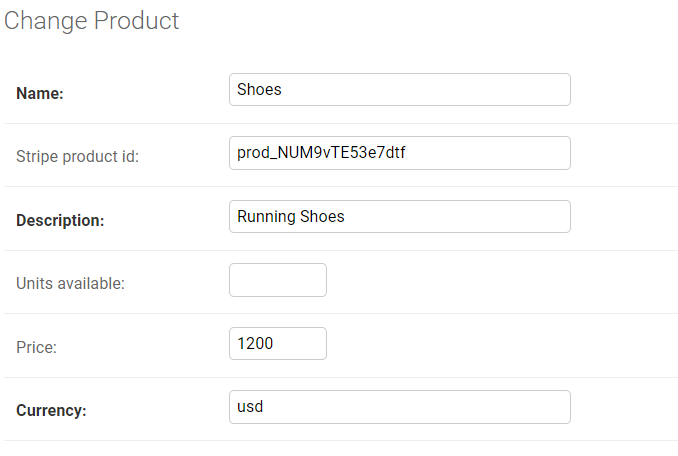
In this demo app, we will be adding two products, Running Shoes and a Shirt, to our Stripe Dashboard. To do so, navigate to the “Products” tab in your Stripe Dashboard and click the “Add product” button. Then, fill in the necessary details for each product, such as name, description, pricing, and any other relevant information.

After we’ve added our Shirt product it should look like this.
Adding Webhooks
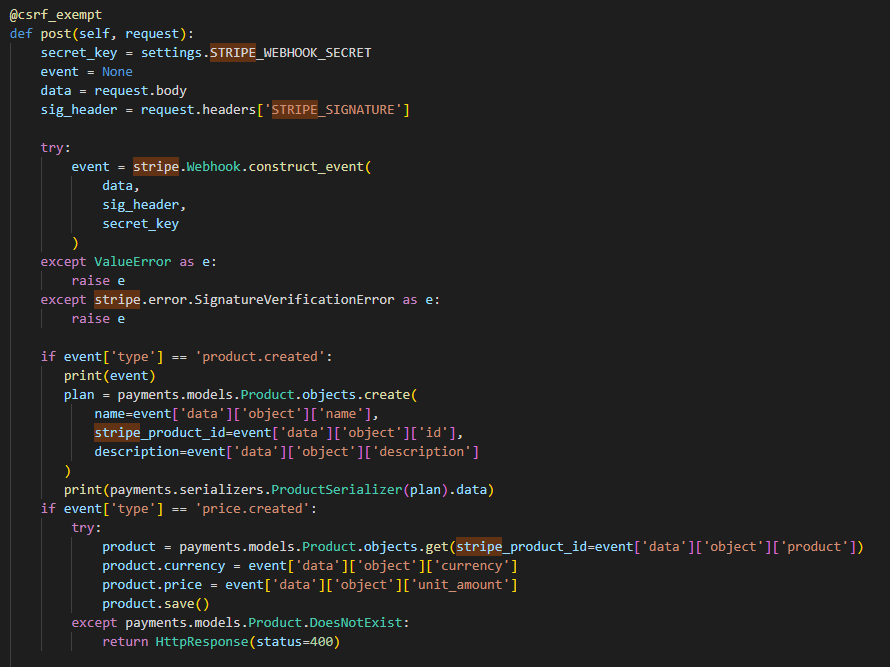
Now that we’ve added our two products we’re going to write two webhooks. These webhooks are going to listen for events product.created and price.created. Why two events? Stripe stores the Product data in two objects. The first object contains the actual data about the product, such as its name, description, image, and so on. The second object is the Price object, which includes the type of price and its value. There are several price type options available, but in this article, we will stick to the standard price.
By utilizing Stripe’s webhooks, you can automate the process of generating objects in your database using Django’s ORM. After setting up the webhook, you can specify the actions to be taken whenever a specific event occurs in your Stripe account. This could include creating a new product or updating it with its price once Stripe has created it.
Using Stripe CLI for testing
To test our webhook integration, we will be using Stripe CLI. To get started, you need to install the Stripe CLI on your computer. The Stripe CLI supports multiple platforms, including Windows, macOS, and Linux. You can find detailed installation instructions for your specific platform on the Stripe CLI documentation page.
After installing the Stripe CLI, you will need to authenticate it with your Stripe account. To do this, open a terminal window and enter the following command:
stripe login
This will prompt you to enter your Stripe API key. Once you enter your API key, the Stripe CLI will be authenticated with your Stripe account. You can now start using the Stripe CLI to interact with your Stripe account. For example, you can create test data, view logs and error messages, and deploy webhook endpoints. To ensure that Stripe CLI knows which route to pass the events we trigger, we need to use the following command:
stripe listen --forward-to localhost:8001/api/webhooks/
The endpoint you’re forwarding to might differ so keep that in mind. To see a list of additional available commands, enter the following command in your terminal. This will display a list of available commands and options:
stripe help
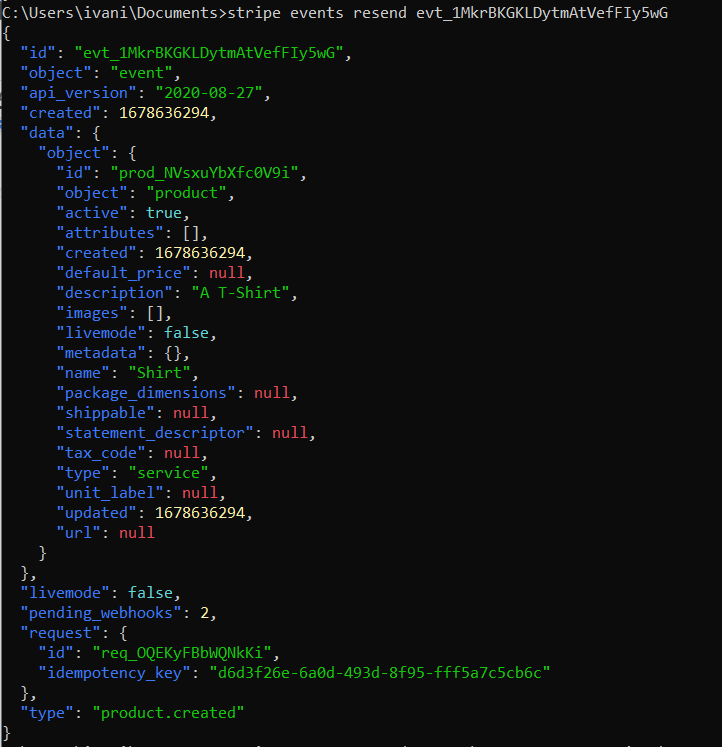
We’ll primarily be using the command stripe events resend <event_id>. This way we can mimic the events where we’ve created our products in our Stripe Dashboard. To find the event id of your specific events go to the Developers section and under Events you can locate your event and its specific id.
And after we’ve completed our tests of our webhooks we should now have two products in our database.
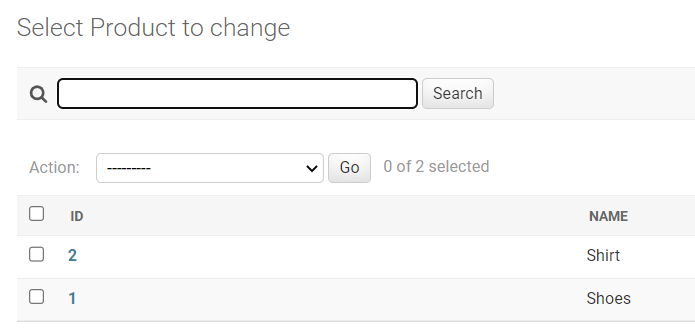
And these products should have their price in cents (because that’s how Stripe remembers them).
We can manually add the numbers of units available in case we later want to limit whether or not someone can add this product to their shopping cart if we don’t have the products available.
Using Stripe Checkout
Now we have our products we’re going to use Stripe’s integrated Checkout session mechanism. We’ve implemented it like this.
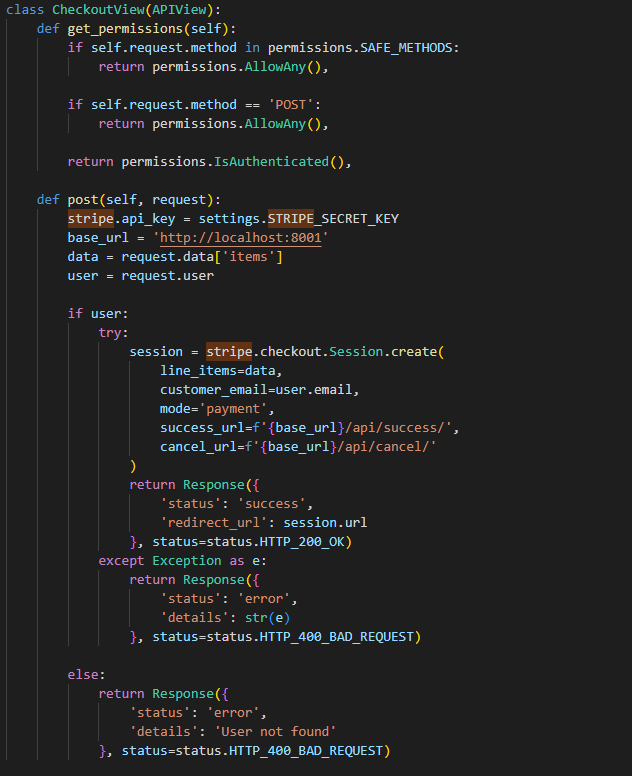
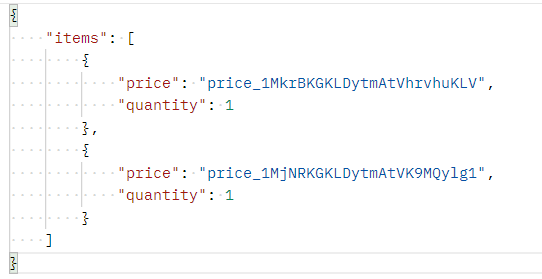
The post method in this view handles incoming POST requests. First, it sets the Stripe API key to the secret key specified in the Django settings. Then, it extracts the data from the items field in the request data and checks for an authenticated user in the request object. If a user is authenticated, the method creates a new Stripe checkout session using the stripe.checkout.Session.create() method. The session includes information on the line items, customer email, and success/cancel URLs. The line items should be defined as a list of products and their quantity, like this:
If the session creation is successful, this method will return the URL generated by Stripe for the checkout session to the frontend of our application. This is an excellent option if you prefer not to handle credit card payment security yourself. Additionally, Stripe provides the ability to customize the interface to match your application’s design. In our case, the checkout session appears like this:
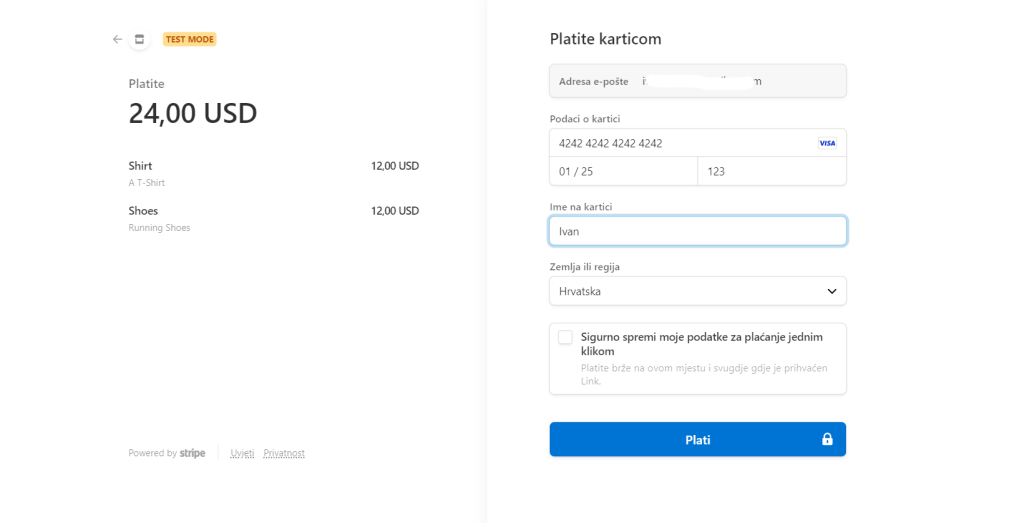
Once a payment is successfully made, Stripe will redirect the user to the success_url that we passed during session creation. If the user cancels the payment, they will be redirected to the cancel_url. It’s important to ensure that both of these endpoints exist on your end to ensure a seamless user experience.
Conclusion
Stripe is a payment service provider that simplifies the integration of payment processing into web applications. Also known for being secure, reliable, and developer-friendly. With Stripe’s API, developers can create custom payment forms, manage subscriptions, handle refunds, and more. Stripe offers a flexible solution for businesses of all sizes with its support for various payment methods. This article provides a step-by-step guide for developers to seamlessly integrate Stripe into their marketplace website, covering the initial project setup, payment processing, and webhooks. With Stripe’s integrated Checkout session mechanism, businesses can handle payments quickly and efficiently, freeing up more time to focus on other aspects of their business.